Quick Start Guide
AirVibe Quickstart Guide
Welcome to AirVibe, your LoRaWAN-based industrial sensor designed to enhance machinery health monitoring. This Quick Start Guide will walk you through the essential steps to get to your beautiful vibration trending and analysis data. Please read this guide thoroughly to make sure your installation goes as smooth as possible.
Unboxing and Inspection
-
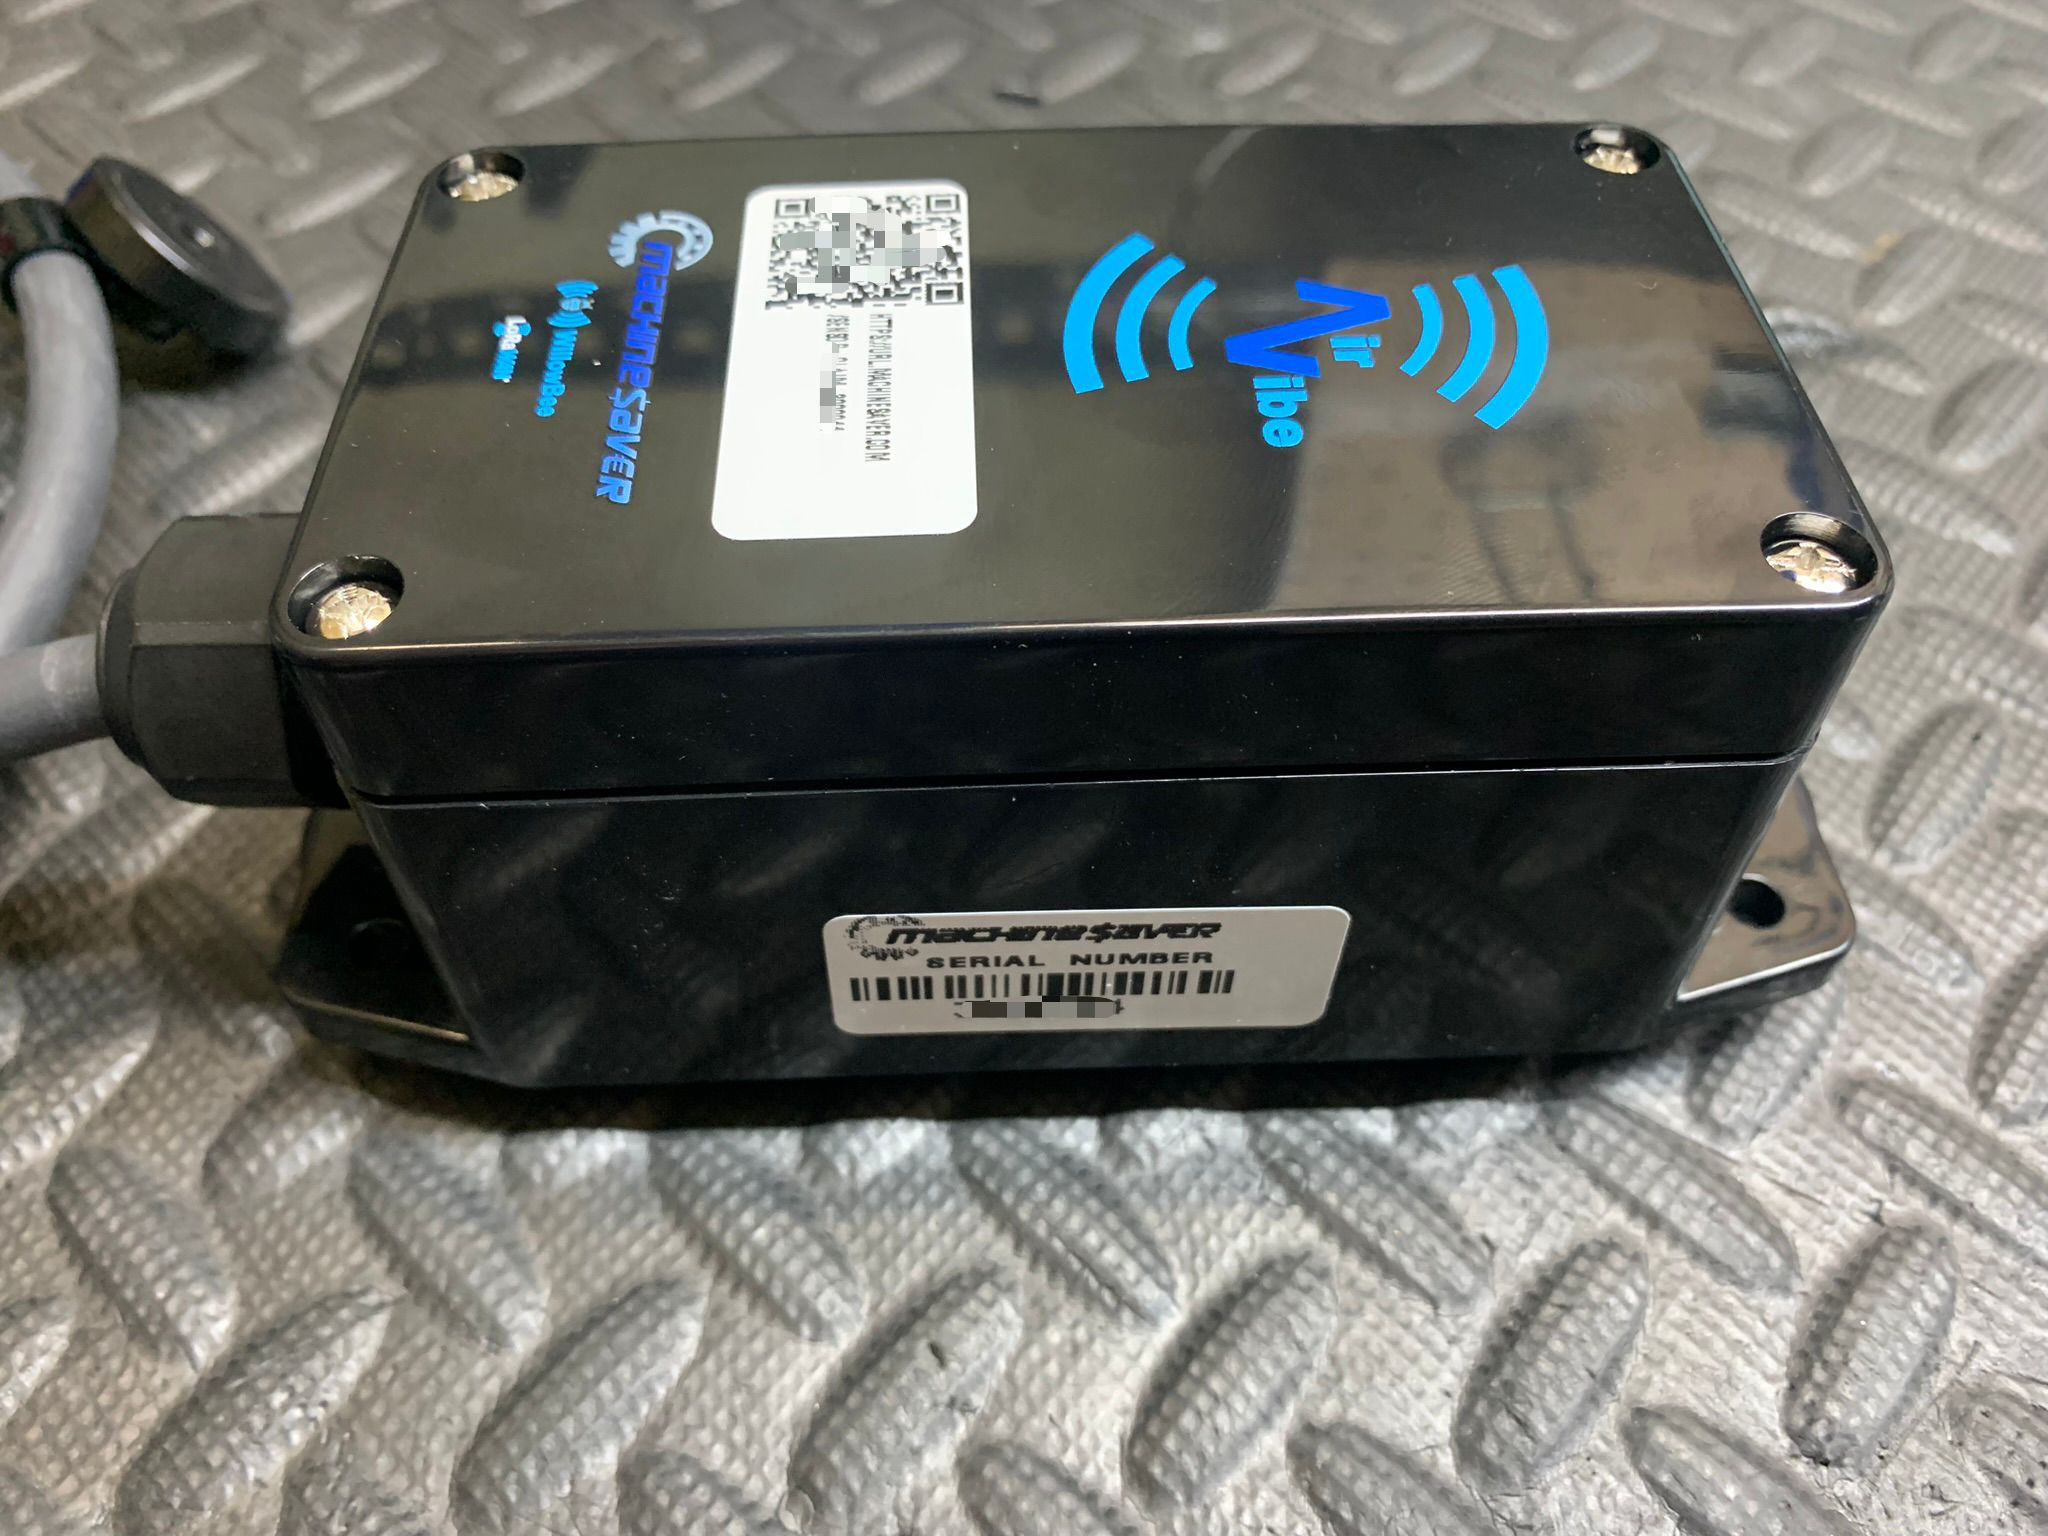
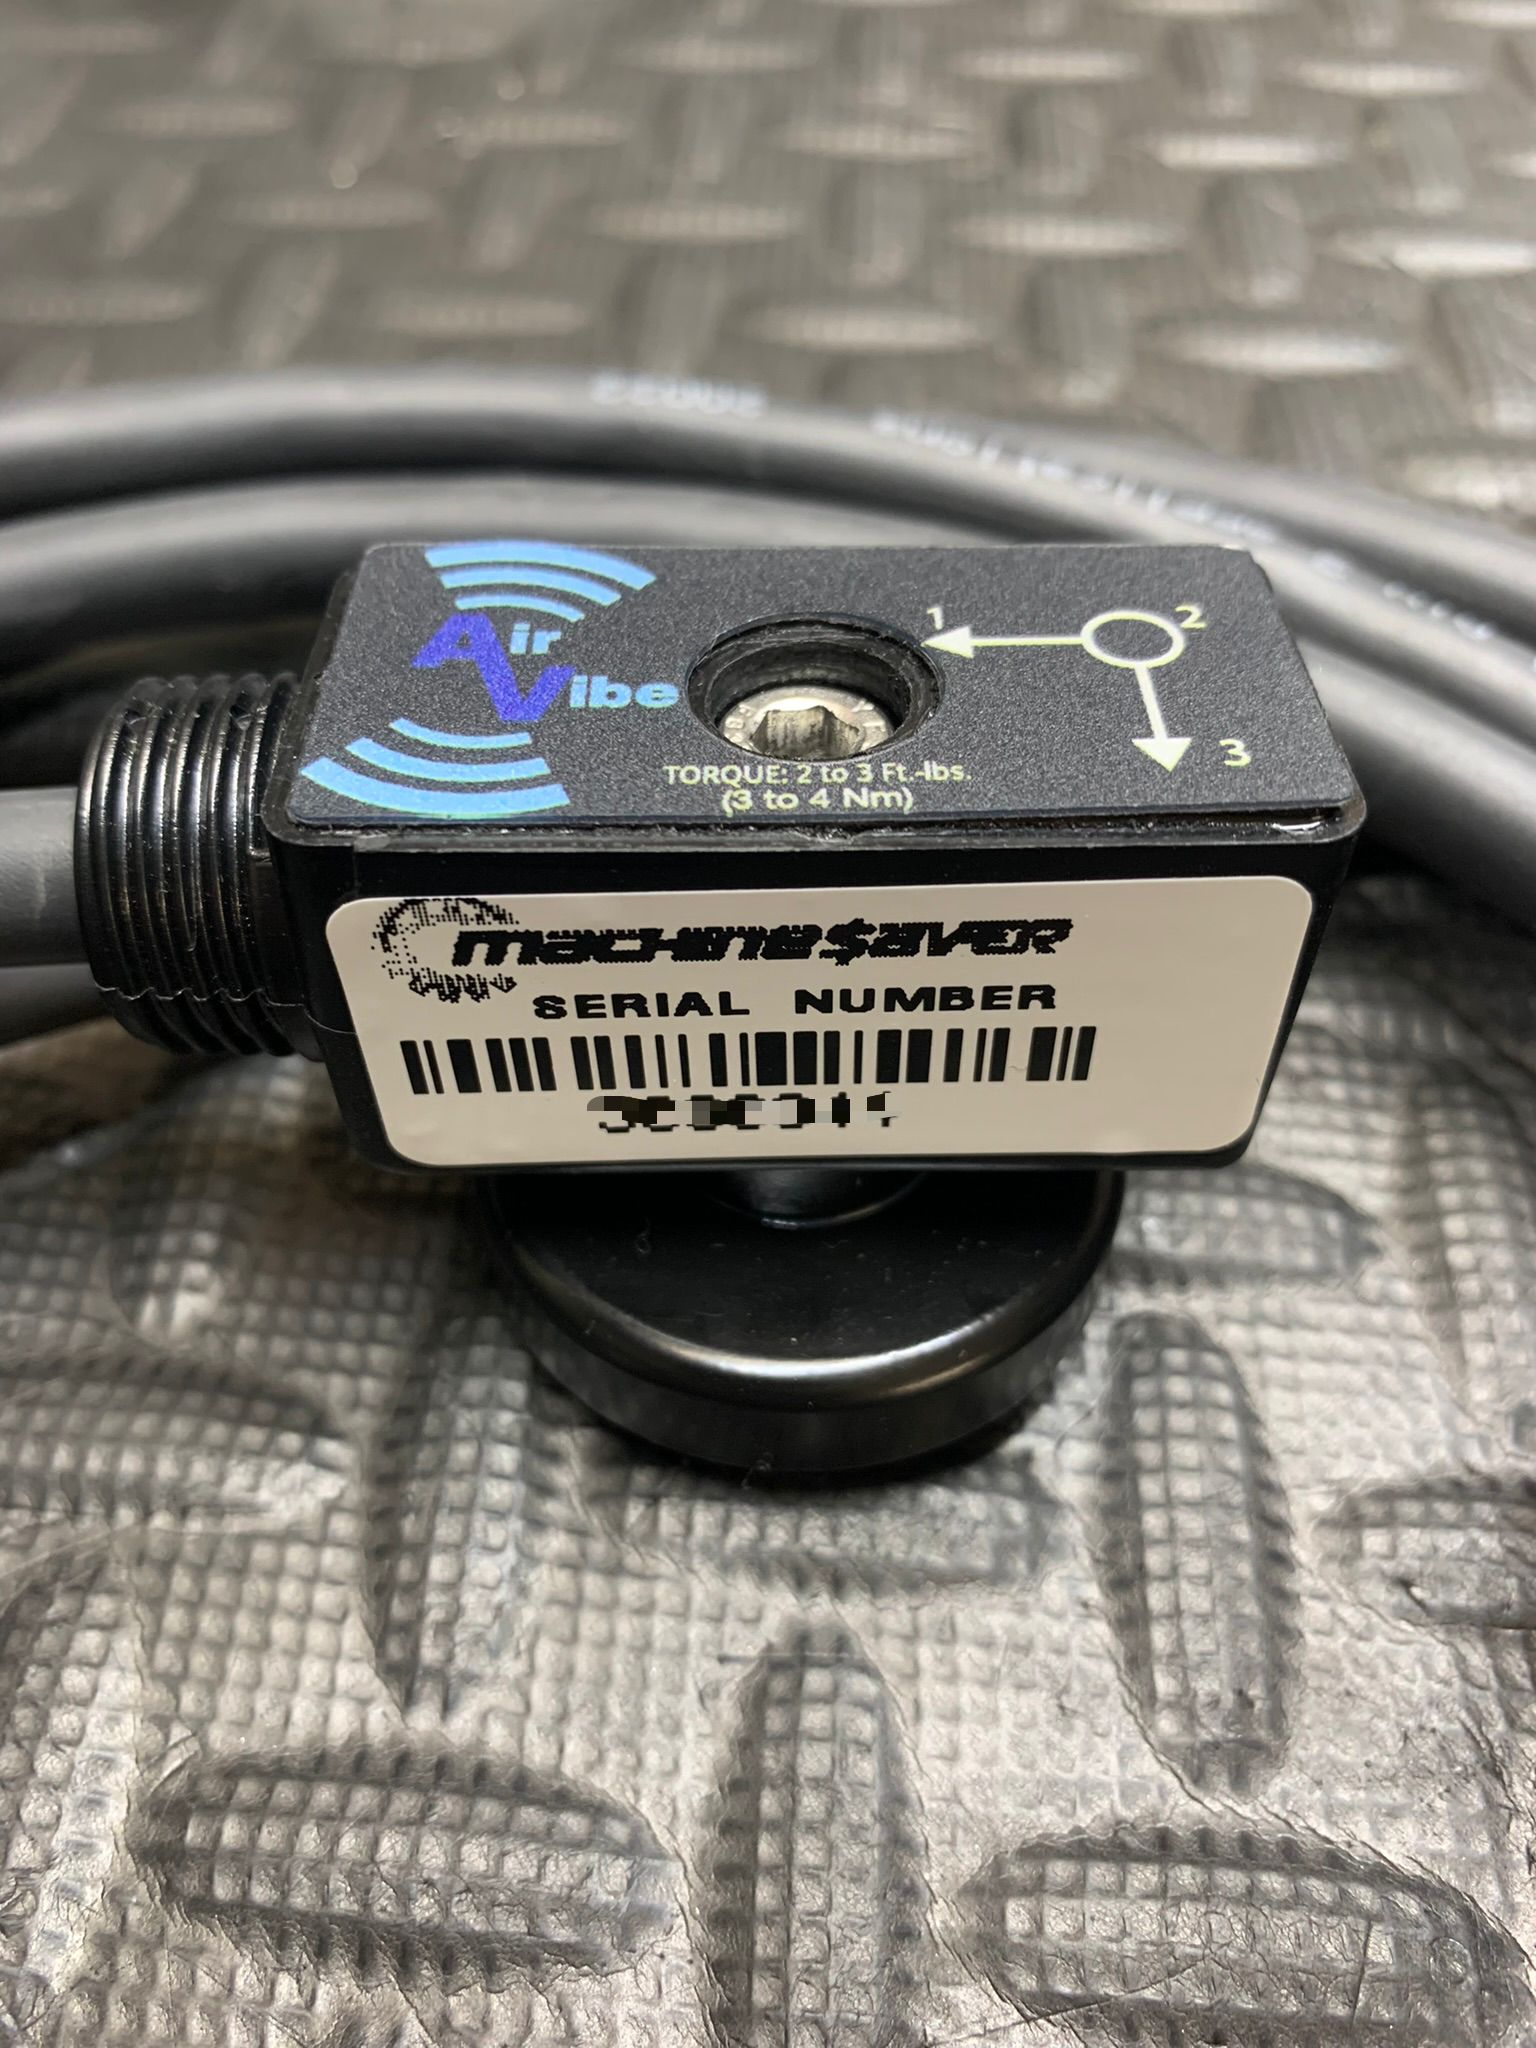
Carefully unbox your AirVibe sensor and ensure all components are included:
-
Inspect for any visible damage during shipping. If you notice any issues, contact support immediately at +1(832)581-9908 or email us at service@machinesaver.net.
Claim Your Sensor(s)
- Find and scan the claim sticker for each AirVibe in your order to claim them. This procedure should be done by the individual in your organization responsible for maintaining credential information.
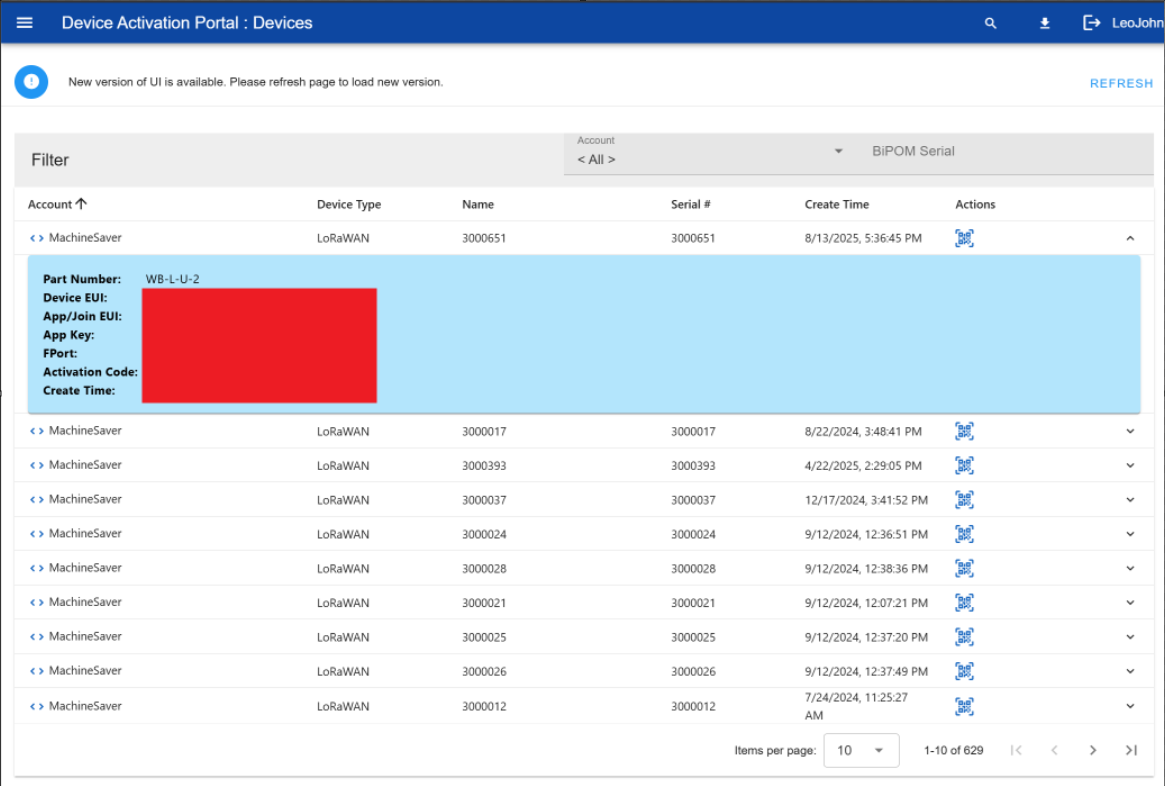
- If you haven't already, setup an account in our LoRaWAN Credential Activation Portal.
- Scan the QR Code or Type in the URL it should look like https://url.machinesaver.com/AV-CLM-XXX-XXX

- This will take you to a page where you can manage all your LoRa device credentials (click on a record to view the detailed information) records from this interface may be queried over our REST API -- please reach out to service@machinesaver.net for details or if you have any issues with the process.
This is useful for anyone who doesn't want to have vendor lock-in, we play nice with other LoRa gateways.
If you're an integrator that wants to pull the data off our device, here is how you can decode our LoRa data packets.
How to decode vibration, temperature, and waveform data Uplink from an AirVibe
How to update parameters or trigger new waveforms by sending a Downlink to an AirVibe.
Power Your Gateway
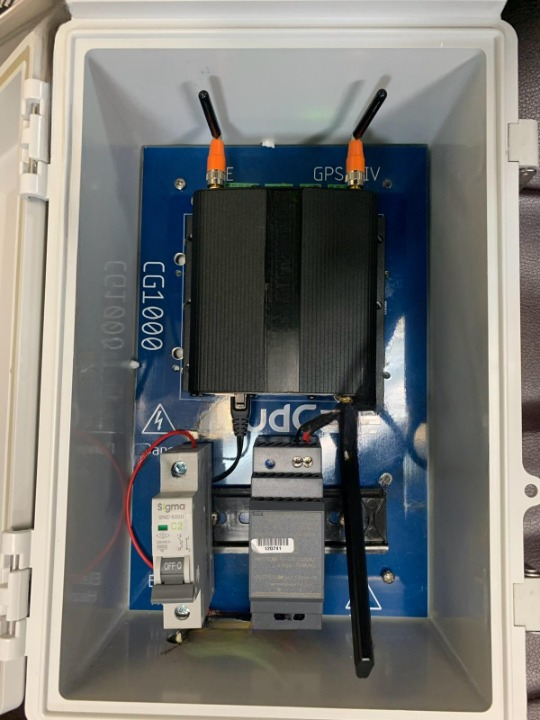
- Plug in the 3 prong outlet to 120v AC. Verify that supplied power is sufficient to power the gateway.
- Flip the switch in the box from OFF-0 to ON-1
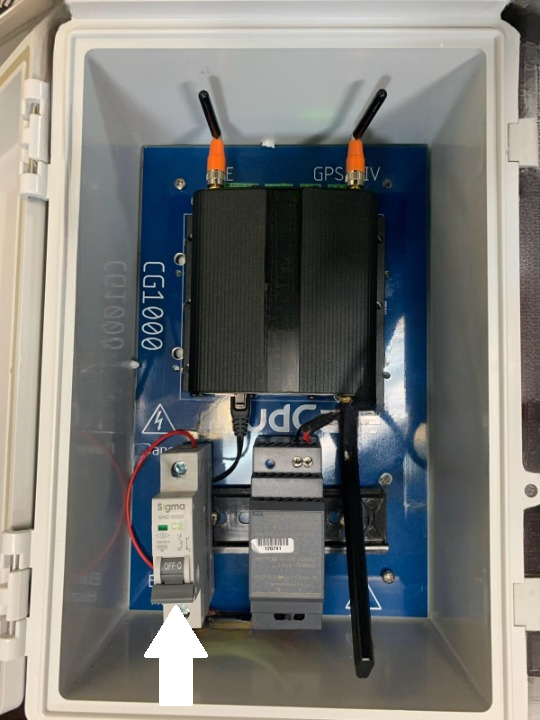
- Within a few minutes of receiving power the status LEDs (next to the GPS antenna) should all turn green.
MachineGate LED Indicator Name MachineGate LED Purpose MachineGate LED States SYSTEM STATE Indicates successful power on and device
readiness
Off: no power
Orange/Amber: booting
Red: error
Green: on
Green flashing: n/aWWAN STATE WWAN State Indicates 3G/4G interface availability and
useOff: no power or not connected
Orange/Amber: on, not connected
Red: WWAN error
Green: on, connected
Green flashing: data trafficWWAN SIGNAL WWAN Signal Strength Indicates 3G/4G interface signal strength Off: no power or not connected
Red: bad signal strength
< -111dbm when connected to 4G < -104dBm when connected to 3G
Orange/Amber: moderate signal strength
>= -111dbm & < -94dbm when connected
to 4G
>= -104dbm & < -94dbm when connected to 3G
Green: good signal strength (>= -94dbm) - If you need assistance getting your gateway up and running, please reach out to our support team.
Note that if you have a MachineGate with a battery backup installed, it will not power off immediately when unplugged, DO NOT TRY TO FORCE IT OFF BY PRESSING OR HOLDING THE FACTORY RESET BUTTON. YOU WILL NOT ACHIEVE WHAT YOU WANT TO ACHIEVE BY PRESSING THIS BUTTON.
If you need to power the gateway off sooner than the system takes to discharge on battery (typically about 30 minutes from a full charge), please contact our support team for assistance.
Identify the optimal location on your machinery to mount the AirVibe VSM
NOTE: The Machine Saver AirVibe User Manual has useful pictures and advice for mounting sensors in the proper location of a machine-component train we highly recommend making use of the full User Manual.
Location : AirVibe User Manual > Machine Train Accelerometer Placement - Page 24 - LINK
- Place it on a solid, vibration-transmitting surface, perpendicular to the shaft centerline, as close to the component of interest (typically a bearing, gear, or belt depending on your application) as possible.
- Avoid areas with excessive flex or damping. Such areas include, but are not limited to, flimsy nameplates, safety shields, end shields, motor fan cover, or any shroud.
- Secure the sensor using the provided mounting hardware, please observe all torque ratings and use breakable blue Loctite 242 where applicable to reduce the chance of vibrating a bolt out of place over time.
If mounting with supplied magnets take care to PLACE the magnet down, do not allow the magnet to slap down on the Machine, this g-force from this can damage your sensor and void your warranty.
- Machine Saver recommends mounting the VSM with the integral cable pointing down, if possible in your application.
Ensure the sensor is oriented correctly for XYZ axis alignment, as marked on the device.You should use a uniform approach to mounting sensor orientation. If you need further assistance please reach out to service@machinesaver.net or call +1(832)581-9908 for more information.
- IMPORTANT - The cable exiting the VSM must be secured to the machine surface as close to the vibration sensor as possible typically 4-6 inches (10-15cm) and not more than 12 inches (30cm). Thereafter, secure the cable at least every 39 inches (1m). Heavy duty and UV ruggedized zip/cable ties are provided with your AirVibe for this purpose. Any excess cable should be looped up and secured on the TPM end and not the VSM end. We do not suggest modifying the cable length in the field, just coil up and secure the excess at the TPM side with the zip ties provided.
- We DO NOT recommend adjusting the length of the integral cable between the VSM and TPM as this will void your warranty. Our recommendation is to coil up any excess cable near the TPM side of the installation using the heavy duty, UV-resistive zip ties provided by Machine Saver. You are also welcome to purchase AirVibes with custom cable lengths, for more information on custom integral cable lengths, please reach out to sales@machinesaver.net or call +1(832)581-9908 for more information.
Identify the optimal location on your machinery to mount the AirVibe TPM
- Keep the TPM away from hot or cold locations (if possible) to maximize battery life.
The fewer large temperature swings for the AirVibe TPM, the better. This is actually the intent behind the 2 part design of the AirVibe system. - Machine Saver recommends mounting the AirVibe TPM with the integral sensor cable and vent pointing down (especially for washdown and outdoor applications - if at all possible, make gravity your friend).
Wake Up AirVibe TPM
- You will need to wake up the AirVibe as they are shipped in sleep mode (which is practically off for battery drain purposes).
- To wake the AirVibe, hold a magnet next to the magnet icon (which indicates the location of the internal reed switch) on the side of the AirVibe TPM until you hear a chime begin (even small rare earth magnets may work for interacting with the reed switch).
- Verify that the sound you heard was the Wake Up buzzer tone (which can be heard by going to the Buzzer Tones section of this guide. If it was a different tone, consult the Buzzer Tones section to understand the state of the TPM before attempting to interact with the reed switch again.
If you have placed a magnet on the Reed Switch but the device does not make any noise please proceed to the Troubleshooting Section.
(Integrators) Connecting to LoRaWAN
- Log into your LoRaWAN network server.
-
Add the AirVibe sensor using its unique DevEUI, AppEUI, and AppKey (provided on the instruction card or sensor label).
-
Confirm the sensor is connected and transmitting data.
Verifying Data Output
-
Access your LoRaWAN network dashboard or connected application.
-
Verify the sensor is streaming data, including:
-
Acceleration RMS (XYZ axes)
-
Velocity RMS (XYZ axes)
-
-
Confirm data updates match expected intervals.
Advanced Features
-
To gather time waveform and spectral data for analysis:
-
Use the monitoring platform https://portal.machinesaver.com/
- Find your gateway.
- Find your sensor.
- Update the push settings from Overall Mode to Overall + Time Waveform Push Mode, or just Time Waveform Push Mode.
-
Refer to the MachineCloud guide for more detailed instructions.
-
Buzzer Sounds/Tones
Buzzer, Chirp, Sounds, Status Sounds
Power On
Join Success
Join Fail
Sending Uplink
Note: Using the buzzer consumes energy, the AirVibe will not have Uplink buzzer enabled by default. In order to turn this feature on you update this setting via downlink to the AirVibe.
Received Valid Downlink (Updates from Machine Gate successfully received)
Wake Up
Sleep
Troubleshooting
Issue: My AirVibe Doesn't Wake Up When Using a Magnet and Reed Switch
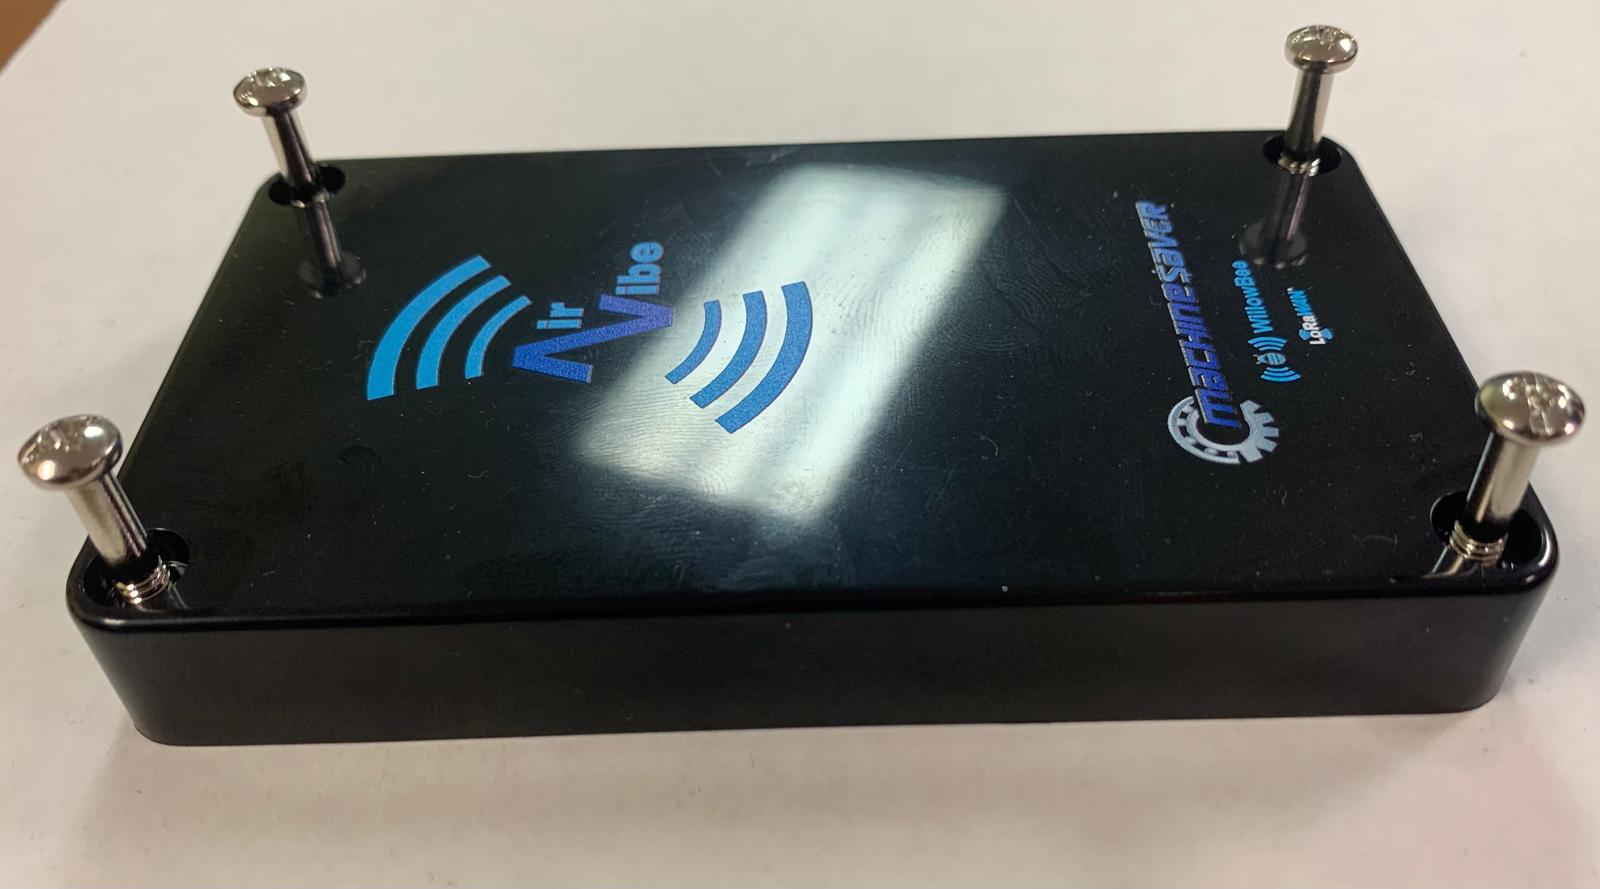
- Turn the 4 lid screws counterclockwise until the threads begin to show (no need to pull them all the way out, as they are captive).
-
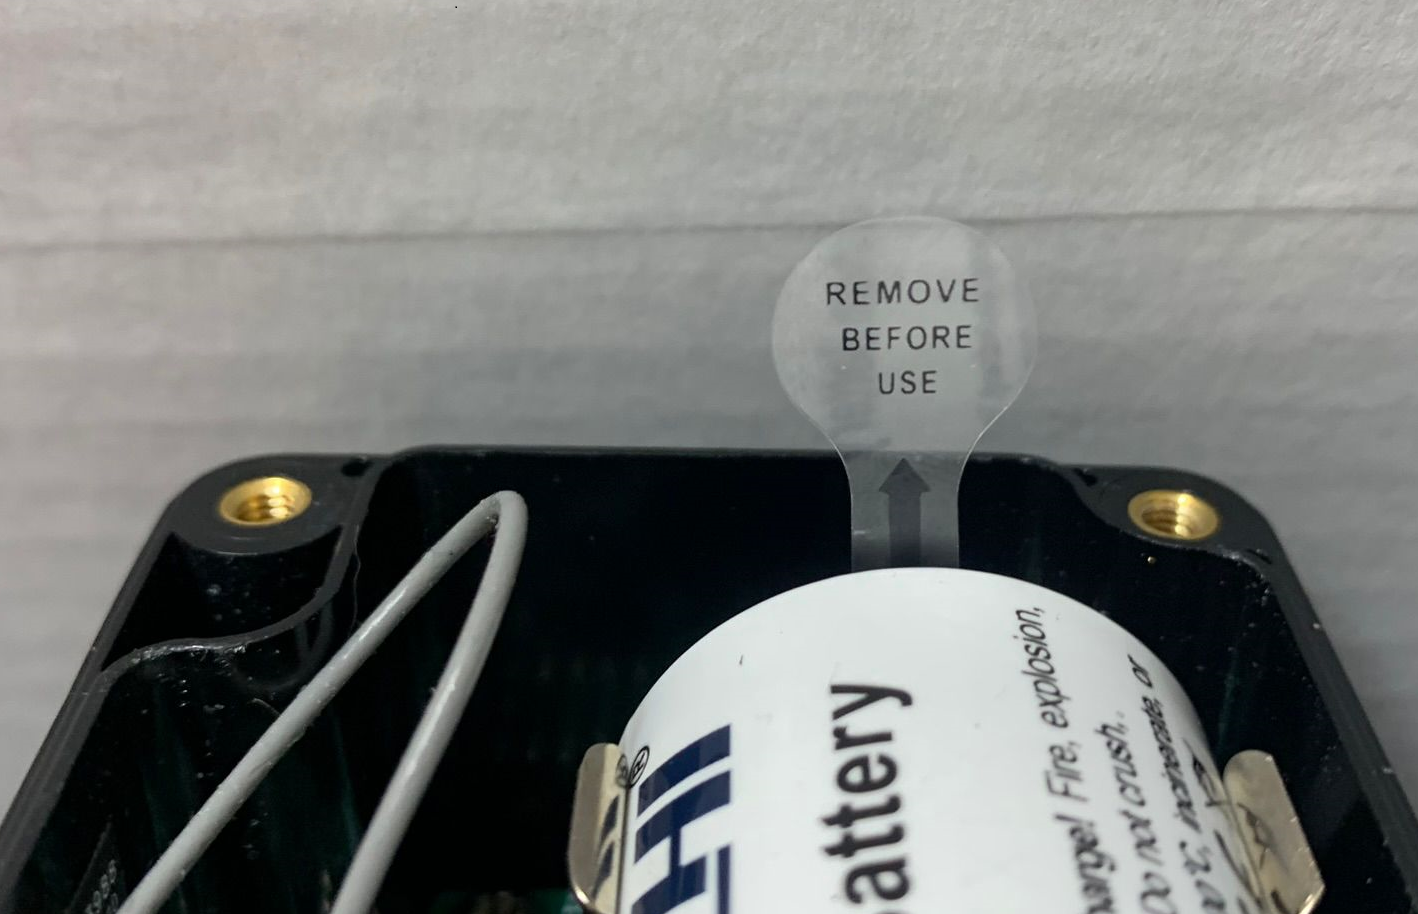
If there is a small clear plastic tab that is between the battery's negative terminal and the metal TPM battery retainer, remove it and try to wake up the sensor again using a magnet and the reed switch.
-
After removing the Tab the Buzzer might make some noise.
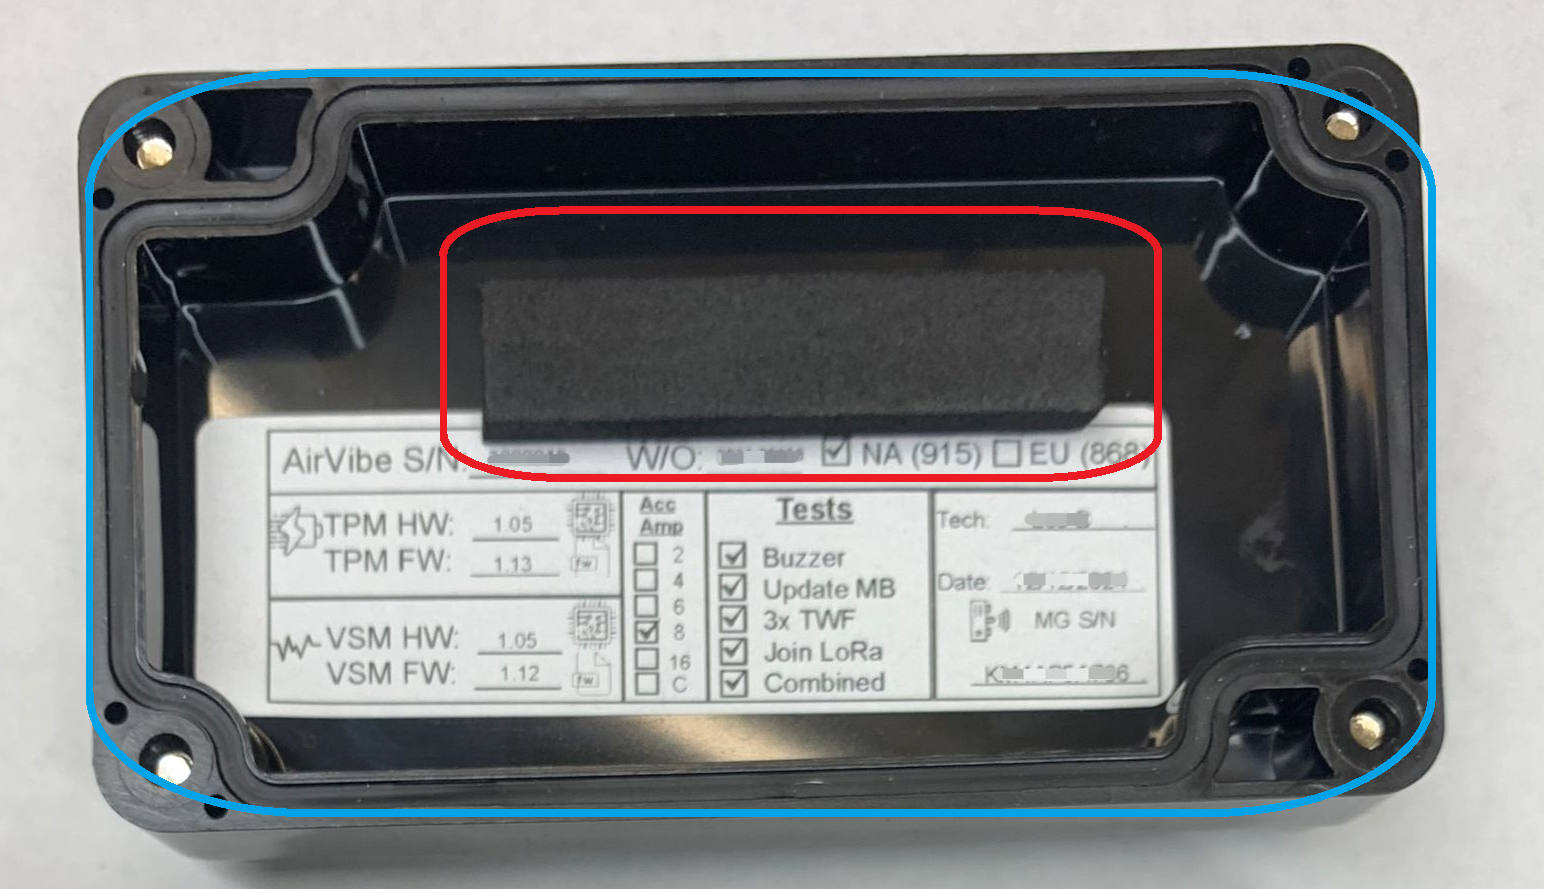
Please consult the Buzzer Sound section for decoding this information. - Verify that the Sealing Gasket in the lid is still in place and seated properly this is important to ensure environmental ratings for the enclosure.
Place the lid back on the device taking care to place the Battery Foam in the proper position to depress the battery when the lid is screwed back on.
Issue: My AirVibe doesn't have a pull tab but will not wake up.
- Open the lid of the AirVibe TPM.
- Carefully, remove the battery. NEVER USE METALIC OBJECTS WITHIN THE TPM.
- Reinstall the battery. Listen for a power on sound.
- If you hear power on sound, Try the wakeup process again.
- If you don't hear a power on sound, verify adequate power is given to the TPM.
A multimeter may be used to measure the DC voltage between +/- battery terminals to verify the 3.6v required for power. If the battery voltage is low, replace the battery. - Replace the lid, ensuring the gasket in the lid of the TPM housing is properly seated and the 4 captive lid bolts are adequately torqued down to prevent moisture ingress to the AirVibe TPM.
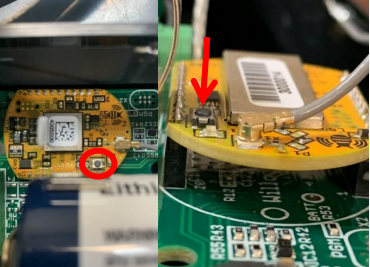
Issue: My AirVibe powered on after battery cycle but the magnetic switch does not change modes.
- Open the lid of the AirVibe TPM.
- Press and hold the button on the Willowbee (small yellow module inside the AirVibe TPM next to the battery.
- Replace the lid, ensuring the gasket in the lid of the TPM housing is properly seated and the 4 captive lid bolts are adequately torqued down to prevent moisture ingress to the AirVibe TPM.
Issue: My AirVibe woke up but is not transmitting data.
-
-
Verify the tags for the AirVibe have been programmed into the MachineGate that you are using.
-
Verify that the LoRaWAN network credentials are entered correctly on the MachineGate LoRa .
- Verify that the MachineGate has been powered and that all 3 status LEDs are solid or flashing green.
- You should also have waited at least 15 minutes after powering the gateway AND 15 minutes after hearing the sensor wakeup sound before expecting to see data on the web portal.
-
For further assistance, contact Machine Saver's service team by emailing service@machinesaver.net.
Thank you for choosing AirVibe! By following these steps, you’ll be on your way to optimizing machinery health and efficiency.


No Comments